Build a DIY Home Security System Using Raspberry Pi: A Step-by-Step Guide
Imagine being able to monitor your home from anywhere, receive instant alerts when something’s amiss, and customize your security setup without breaking the bank. Sound too good to be true? With a Raspberry Pi, it’s not only possible—it’s surprisingly straightforward. In this guide, you’ll learn how to build a robust, AI-enhanced home security system using this versatile mini-computer, tailored to fit your needs and budget.

Why Raspberry Pi Is Perfect for Home Security
Raspberry Pi has revolutionized DIY tech projects, and home security is no exception. Its compact size, affordability (starting at around $50), and powerful processing capabilities make it an ideal hub for integrating cameras, sensors, and smart devices. Unlike off-the-shelf systems, a Raspberry Pi setup lets you control every aspect—from motion detection sensitivity to how alerts are sent—ensuring your system grows with your needs.
Essential Components for Your Raspberry Pi Security System
Before diving into the build, gather these key components:
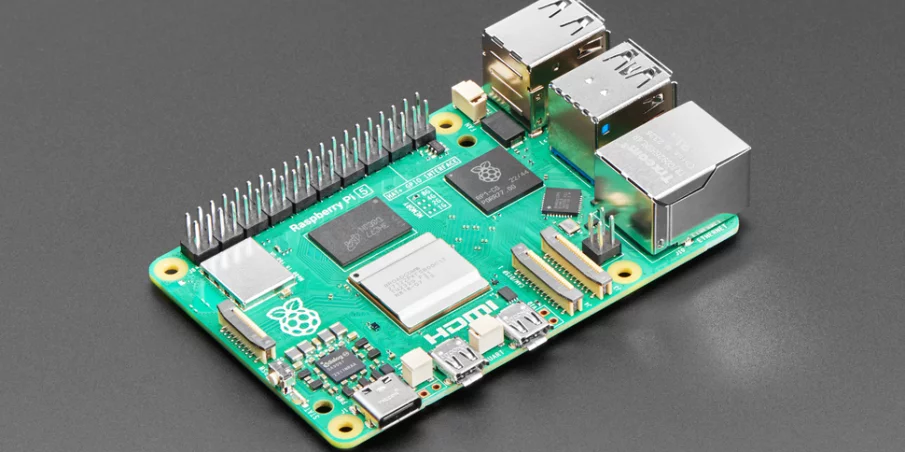
Raspberry Pi 5
The latest model, Raspberry Pi 5, offers enhanced performance with its quad-core processor and USB 3.0 ports, making it capable of handling multiple cameras and sensors smoothly.
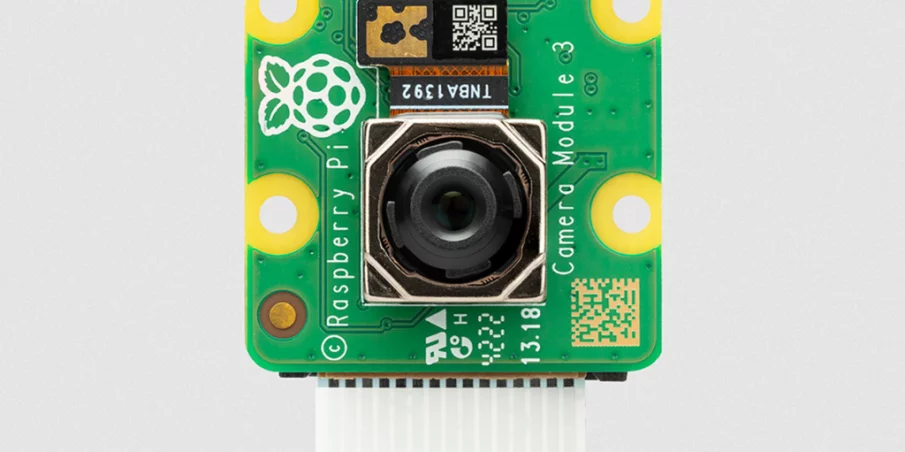
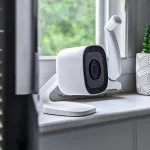
Cameras
Choose between a Raspberry Pi Camera Module (for crisp video) or a USB webcam (for plug-and-play simplicity). Wireless IP cameras can also be integrated for flexible placement.
Sensors
- PIR Motion Sensors: Detect movement in specific areas.
- Door/Window Contact Sensors: Alert you when entry points are opened.
- Smart Sirens: Deter intruders with loud alarms triggered by sensors.
Storage
Use a microSD card (32GB+) for the operating system and an external USB drive or cloud service (like Google Drive) to store footage.
Software
- MotionEyeOS: A user-friendly platform for video surveillance and motion detection.
- Home Assistant: For integrating smart devices and creating automation rules.
Step 1: Set Up Your Raspberry Pi
Install the Operating System
- Download Raspberry Pi OS or MotionEyeOS from their official sites.
- Use Raspberry Pi Imager to flash the OS onto your microSD card.
- Insert the card into the Pi, connect peripherals (monitor, keyboard, mouse), and power it up.
Initial Configuration
- Update the system:
sudo apt-get update && sudo apt-get upgrade - Enable SSH and VNC for remote access under
Preferences > Raspberry Pi Configuration.
Step 2: Connect Hardware Components
Attach Cameras and Sensors
- Pi Camera Module: Connect it to the CSI port on the Pi.
- USB Webcam: Plug it into a USB port.
- PIR Sensors: Wire them to the GPIO pins (e.g., GPIO4 for motion detection).
Test your camera with:
libcamera-hello
For USB webcams, use fswebcam to capture test images.
Step 3: Configure Motion Detection and Alerts
Using MotionEyeOS
- Install MotionEyeOS via its pre-built image or Docker.
- Access the web interface at
http://:80and configure:- Motion Zones: Define areas to monitor.
- Recording Settings: Save clips to local storage or cloud.
- Notifications: Set up email/SMS alerts via IFTTT or SMTP.
Custom Python Scripts
For advanced users, write a Python script with OpenCV to analyze video feeds. Example:
import cv2
import smtplib
from datetime import datetime

# Capture image on motion detection
def send_alert():
    ret, frame = camera.read()
    cv2.imwrite('intruder.jpg', frame)
    # Send email with attachment
    server = smtplib.SMTP('smtp.gmail.com', 587)
    server.starttls()
    server.login("your_email", "password")
    server.sendmail("from", "to", "Subject: Alert!\nIntruder detected!")
This script saves an image and sends an email when motion is detected.
Step 4: Enable Remote Access
VPN or Cloud Services
- Home Assistant Cloud: Offers secure remote access via a subscription.
- DuckDNS: A free dynamic DNS service to access your Pi from anywhere.
Port Forwarding (Advanced)
- Log into your router.
- Forward port 8123 (Home Assistant) or 80 (MotionEyeOS) to your Pi’s local IP.
- Always use HTTPS and strong passwords to prevent breaches.
Step 5: Integrate Advanced Features

AI-Powered Recognition
Boost your system with AI kits like Hailo 8L. Train it to recognize family members using the face_recognition library and trigger alerts for strangers.
Smart Home Integration
- Link smart locks (via Home Assistant) to auto-lock doors when motion is detected.
- Use voice commands (Alexa/Google Assistant) to arm/disarm the system.
Troubleshooting Common Issues
Camera Not Detected
- Ensure the camera is enabled via
sudo raspi-config > Interface Options. - Check wiring for loose connections.
False Alerts
Adjust motion sensitivity in MotionEyeOS or tweak PIR sensor placement to avoid pet triggers.
Security Best Practices
- Update Regularly: Keep Raspberry Pi OS and software patched.
- Use Strong Credentials: Avoid default passwords like “admin.”
- Enable Firewall: Block unauthorized access with
ufw.
Final Thoughts
According to home security experts who write for us on home security, Although using a Raspberry Pi can lower the cost of building a home security system, but it isn’t just about saving money—it’s about crafting a solution that fits your lifestyle. Whether you’re mounting cameras at entry points, programming custom automations, or experimenting with AI, the possibilities are endless. Ready to take control of your home’s safety? Grab a Raspberry Pi and start building today.
More to Read:


Previous Posts: